Allow or deny access to locations using the iOS 6 privacy controls
With iOS 6 you can decide which application does what and when. It allows you delicate control and fine-tuning of built-in apps and the apps you install from the App Store. If you’re not comfortable with apps accessing and sharing your location you can disable this feature on an per-app basis or disable it once and for all. For example you can prevent the Camera app access to location services or have the Weather app still access those features.
Launch an app for the first time and grant or deny it access
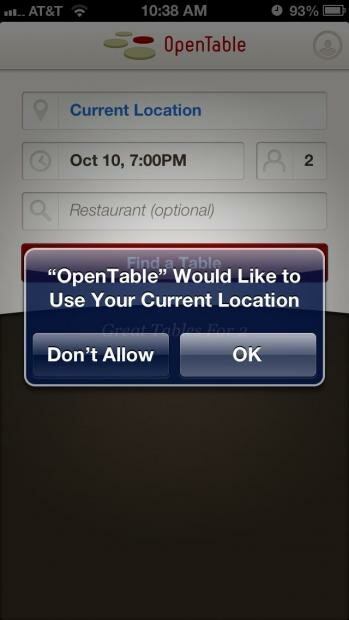
Whenever you launch an app for the first time, that app has to ask you if you want it to allow access to your location. You can tap the OK button if you wish to do so. If not, tap the Don’t Allow button instead.
Disable and enable the iOS 6 location services
When you first start using your iPod Touch, iPad or iPhone, you are asked if you wish to enable location services for the iDevice. You will do so globally if you opt to enable them. If you don’t allow them globally, applications like Maps and turn by turn navigation will not work, you won’t have time displayed and other apps will require manual settings to work. But if you want to turn off this feature nonetheless, you can do so following the steps below:
1. Tap the Settings icon to launch the Settings app from your Home screen.
2. Choose the Privacy tab.
3. Choose Location Services.
4. Slide the On button right next to Location Services to Off.
Enabling and disabling location services depending on specific applications
Thanks to the new iOS 6 you can enable or disable location services on a per-app basis. To do so you must:
1. Tap the Settings icon to launch the Settings app from the main screen of your iDevice.
2. Pick the Privacy tab.
3. Choose Location Services.
4. You will be presented with a list of apps currently supporting location services. Slide the button next to their names to the Off position and those particular apps won’t be able to use location services anymore.
If you later would like to turn them back on you will be able to do so while following the same steps as above then switching the same button to the On position.


