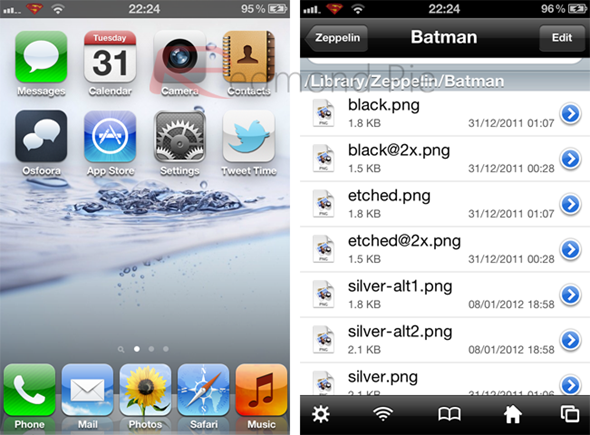
Change the iPhone carrier logo easily

Changing the iPhone original carrier logo with your own custom image is very simple. If you have a jailbroken iPhone you are probably familiar with the process of changing the iPhone carrier logo. If, on the other hand, you do not have a jailborken iPhone, don’t worry: there is an App called CarrierEditor that allows you to modify your iPhone’s (or iPad’s) carrier logo to a custom image without having a jailbroken iPhone.
CarrierEditor is an application made by uhelos and Pix3lDemonand and it is only available on Mac OS X. The way it works is it produces a carrier config file and this file is loaded to your iPhone or iPad through iTunes in order to modify your iPhone’s / iPad’s carrier logo. Below, we will provide a simple set of instructions on how to modify the iPhone (or iPad) original carrier logo with your own custom logo.
Change the iPhone Carrier Logo in 7 easy steps
Step 1. In the first step you need to download the CarrierEditor dmg file; you can download it from here.
Step 2. Now that you have the file, you need to mount it. You can mount it by double clicking on it. Once the dmg file is mounted, you need to open the CarrierEditor.app and select “Let’s Get Started.”
Step 3. In this step, use your iPhone (or iPad) to navigate to: Settings, from there tap on General and finally choose About. Then you need to scroll down until you find “Carrier” and there you will see the carrier version number. You will have to enter the version number in CarrierEditor.
Step 4. Next, in CarrierEditor, you will have to pick your device and your carrier from the drop down menu. Once you choose both the device and the carrier, press next to go to the Customization screen.
Step 5. The Customization screen is where you will be able to add a custom image to replace your iPhone / iPad carrier logo. CarrierEditor comes with a large number of custom logos, which you can find in the “Zeppelin Logos” folder.
In the Customization screen, there will be two boxes. You need to drag in your status bar images (the black / white image which is found when the status bar is ‘black’ and an ‘etched’ image which is found when the status bar is tinted in blue or white) in the adequate boxes. You must also make sure that the images’ size is adequate; otherwise the results may not look very good. After you have done all this, you can press the “Compile Carrier Update (.ipcc)” button. CarrierEditor will create two files and place them on your desktop. The files (in .ipcc format) will be your custom logo and the original carrier logo.
Step 6. Now to load your file to your iPhone or iPad through iTunes. Once you have iTunes opened, you have to connect your iPhone (or iPad) via the USB cable. In iTunes you need to select your device. With the “alt / option” key pressed, push the “Restore iPhone” button; then you will have to navigate to your desktop and choose the correct .ipcc file to load (choose the custom logo .ipcc file and not the original carrier logo .ipcc). Please note that this will not restore your iPhone / iPad; it will simply modify the carrier settings in order to add a custom logo.
Step 7. After iTunes finished updating the carrier settings you will have to reboot your iPhone / iPad. After the reboot, your new custom logo will be visible in the upper left part of your device’s screen, instead of the original carrier logo.
If, for any reason, you want to use the original carrier logo again, all you need to do is repeat the process from steps six and seven and instead of the custom logo file, you need to load the original carrier logo file to your device via iTunes.


