How To Use Screenshot Frame Maker app on your iPad and iPhone
Whether you are a blogger, a journalist or just somebody browsing the internet, taking screenshots is something that probably happens often, with a higher or lower frequency depending on what you do. For a blogger or journalist, taking screenshots is an important part of the job as screenshots complement the article and serve the purpose to show the viewer whatever is reviewed, previewed or described. After all, a picture is worth a thousand words and what best way is there to describe something when you lack a thousand words if not taking a screenshot? But sometimes, just taking a screenshot may not be enough. In most cases a simple screenshot will do, but what if you want to show that screenshot in a very nice and elegant way? What if you want to present your screenshot in a hardware frame? A hardware frame would certainly give it a touch of elegance regardless of the screenshot’s purpose: whether it represents a reviewed product or simply a screen grab of a web page, having the screenshot framed will certainly make it stand out. There are specialized programs that can do that, but what about the screenshots you have made with your iOS device?
Neoos to the rescue, with their Screenshot Frame Maker app for iOS. Who or what is Neoos? Neoos is a company that specializes in IT (information technology) for mobiles, developing smartphones apps that aim to give the user easy access to complex things. As a side note, Neoos is also the company that made Doodle.com, which is a service designed to make meeting schedules more simple, a service that manages to bring 10 million users monthly. One of their newest products is called Screenshot – Frame Maker and it is an app for iOS devices app, its purpose being to simplify the process of framing your screenshots into an iOS device (iPad, iPhone ) hardware frame.
How to use Screenshot Frame Maker
Using Screenshot – Frame Maker is actually very simple, thanks in part to its easy to use user interface. The Frame Maker app imports your screenshots (from your iPad or iPhone’s camera roll) and analyzing the image size it auto detects what hardware frame to use (not only does it detect the device type, but it also the orientation). After the auto detection process, Frame Maker frames your screenshot (using the auto detected hardware frame) and it gives you some options to choose from when it comes to exporting your new framed screenshot. These options are: send the resulted image by email, save it to your Camera Roll, copy it to the Pasteboard, Tweet the framed image and save it to Dropbox. We will explain each of these export functions, but not before mentioning that you can export framed images either grouped together or just one by one.
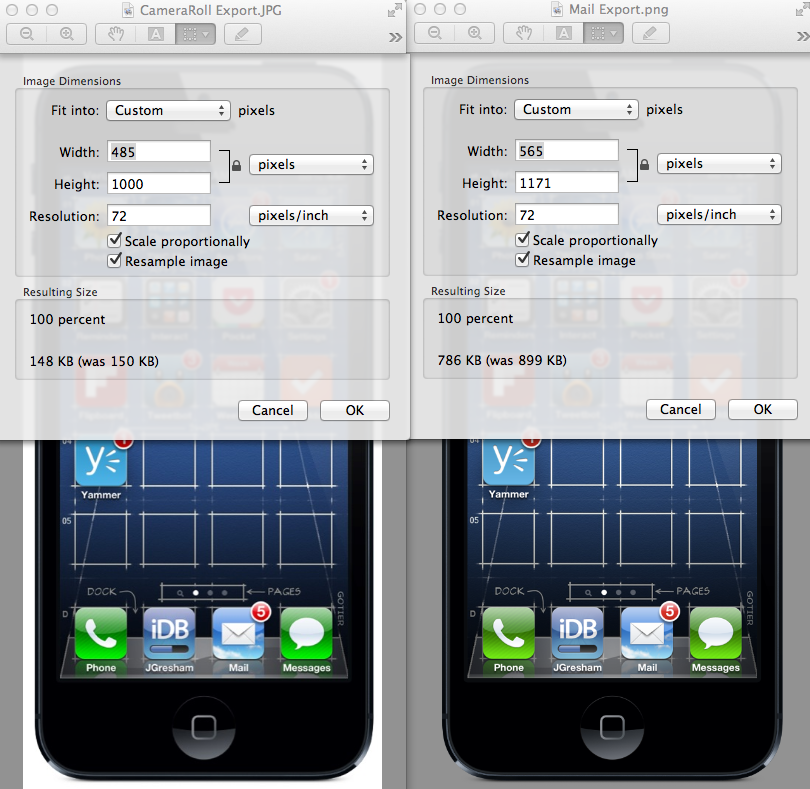
Most of the export functions are self explanatory: sending by email will export your image as a .png (which is a lot bigger size wise than saving it as a .jpg) and it does not include a white background, instead having a transparent one. Saving the framed image to your camera roll on the other hand exported it to a .jpg that did include a white background. Likewise, choosing to Tweet the framed image produced a .jpg with a white background similar to exporting to your Camera Roll. Exporting to Dropbox will keep the image size intact, not compressing it in any way and it will also include a transparent background instead of a white one.
Among the settings offered by Frame Maker, there are: having reflections on the screen (you can turn this option, like all the others, on or off), margin controls, adjustments regarding the max width and height, full size toggle with the option to set it to on or off and you can choose the default color for the hardware frame (you can also change the hardware color for each export as well). New to the 1.2 version of Screenshot – Frame Maker is an internal redeem code system as is the ability to makes use of other devices’ hardware frames for you screenshots (for example, taking a picture with a 3GS and using an iPhone 5 hardware frame). Also in the 1.2 update Neoos added the option to export to your Camera Roll as .png images, complete with transparent background.
Final words
If you need to take screenshots a lot, for whatever reason, and care about presentation, this little app will save you a lot of work and trouble. Using a dedicated editing program (like Photoshop) to apply an iDevice frame to your screenshots is time consuming, not to mention it requires photo editing skills. Screenshot – Frame Maker simplifies this so the user only has to take a screenshot, place it in the hardware frame and export it to a variety of places, all this from the user’s iOS device. When you download the app for the first time you will also get five free exports. After you spend these 5 exports, you need to make a $0.99 in-app upgrade which will give you an unlimited number of exports on iOS devices.
That being said, if you need to take a lot of screenshots (maybe you are a blogger, or a developer or maybe a publisher, or writer or reviewer) and you need them elegantly placed in an iOS device (iPhone, iPad) hardware frame, Screenshot Frame Maker is probably a good investment for you. It transforms your screen grabs in ready to use hardware framed images, exports them in a variety of useful ways and offers plenty of settings (for example allowing you to change the hardware frame color). Not to mention, with its 1.2 update it introduced the possibility to export as .png to your Camera Roll. As is always the case, whether this $1 app is useful or useless is your decision.


